|
|
Post by nfalls116 on Dec 26, 2015 18:16:21 GMT -5
Is it going to be on the floor?
|
|
|
|
Post by scrub-buster on Dec 26, 2015 18:38:44 GMT -5
Nope. We made a stand for it out of 2 push mower bagger frames. I'll post some pictures when I get it ready to install.
|
|
|
|
Post by bullseye69 on Dec 26, 2015 19:19:57 GMT -5
Hummmmmmmm got me thinking now.
Thanks for putting ideas in my head.
Really some good work there!
|
|
|
|
Post by scrub-buster on Dec 26, 2015 22:14:20 GMT -5
Here is what we did for the door latch. 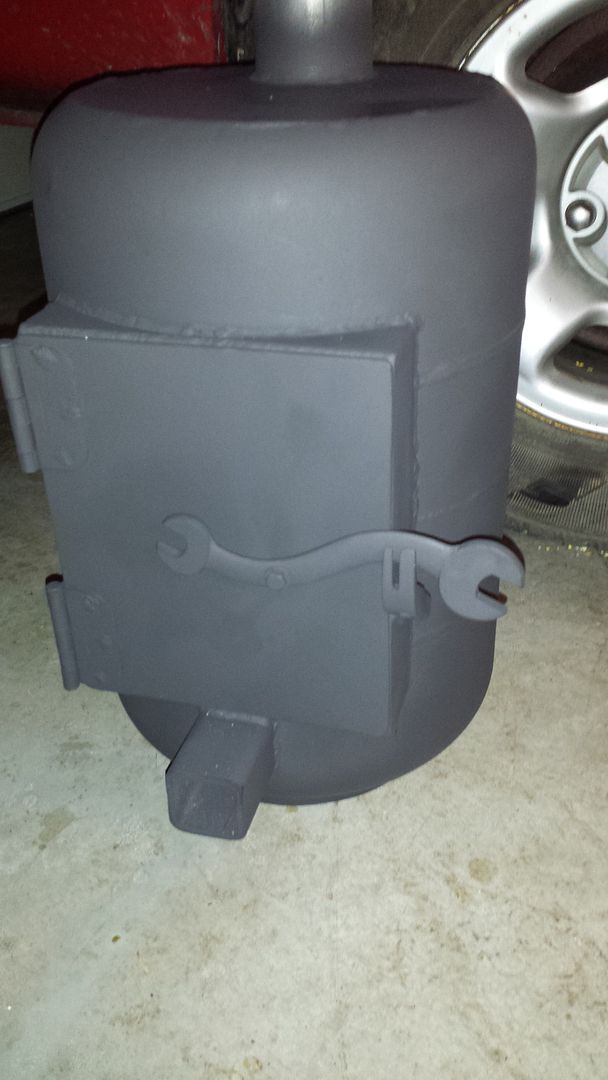 |
|
|
|
Post by throbak on Dec 27, 2015 8:37:05 GMT -5
Better put a nut in the wrench with some wood on it You'll get burned the way that is
|
|
|
|
Post by scrub-buster on Jan 1, 2016 20:24:48 GMT -5
I'm going to see how hot the handle gets. If its going to burn me I'll weld a bolt in the wrench and put a wood handle on it. I made the stainless panel for the window today. I'm going to try to finish everything up this weekend. 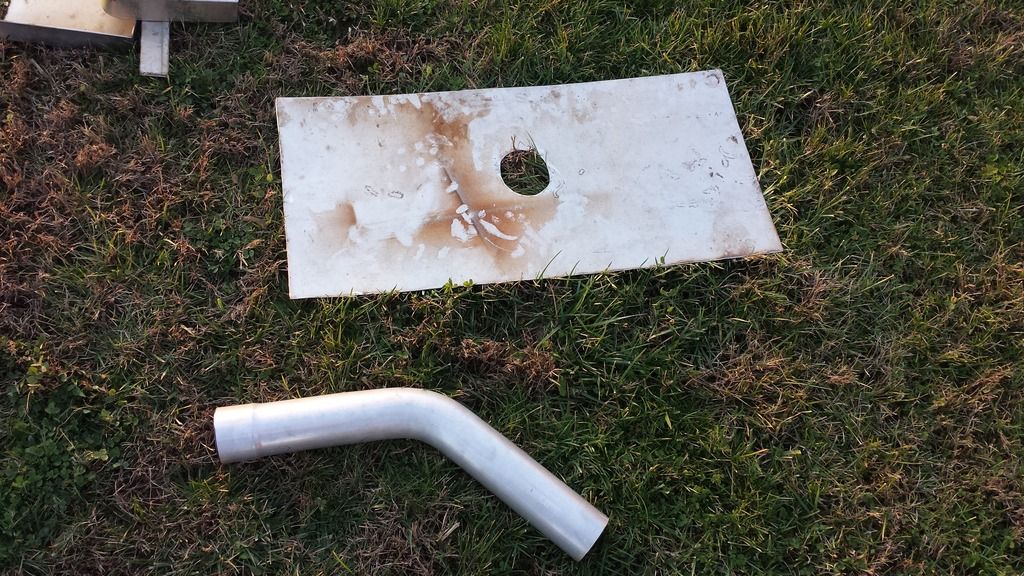 |
|
|
|
Post by nfalls116 on Jan 2, 2016 0:26:35 GMT -5
I'm going to see how hot the handle gets. If its going to burn me I'll weld a bolt in the wrench and put a wood handle on it. I made the stainless panel for the window today. I'm going to try to finish everything up this weekend. the window closes on the panel and the chimney exits? |
|
|
|
Post by Sasquatch on Jan 2, 2016 12:03:31 GMT -5
It's all-around cool and it has style as well.
|
|
|
|
Post by scrub-buster on Jan 2, 2016 20:07:54 GMT -5
Thanks! I made a trip to the hardware store this morning and got everything I should need to finish up this weekend. I had to improvise on most of it. It's hard to find stuff for 3" pipe. I found a roof flashing in the plumbing isle that I can make work. It has a rubber gasket for a 2" pipe but when I took the rubber off the opening was a perfect fit for my chimney pipe.  I did a test fit and I think it will work out. I'll bolt it down when I finish fitting everything together. 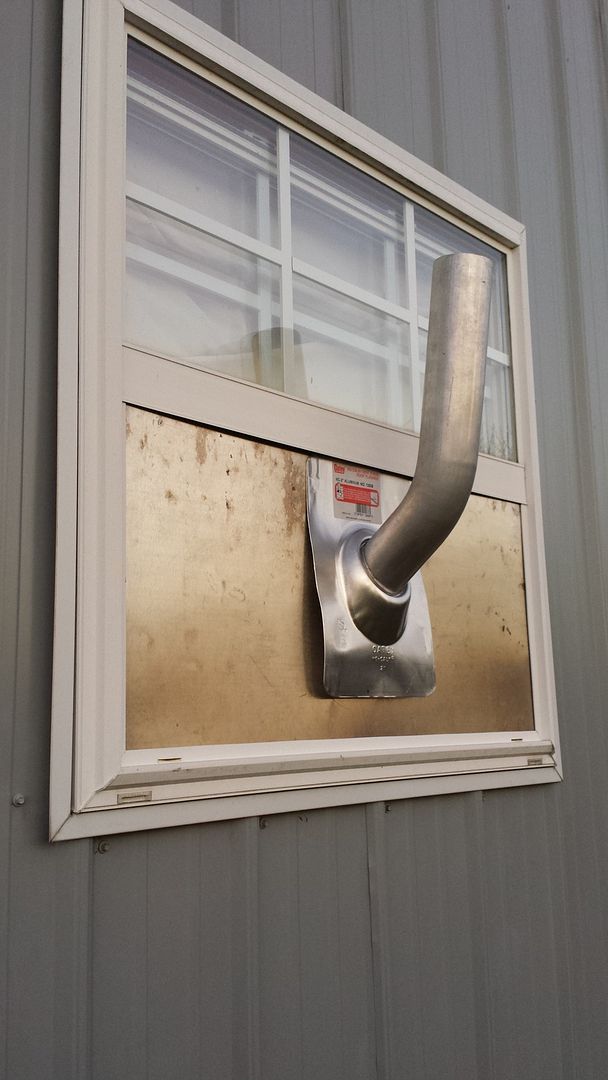 I finished up the damper. I'm pretty happy with how that turned out. 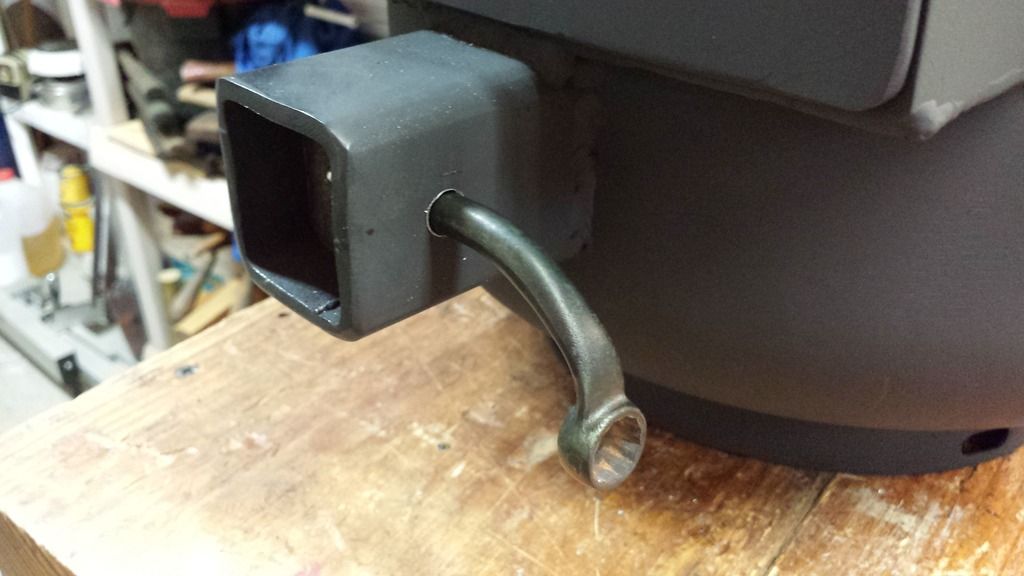 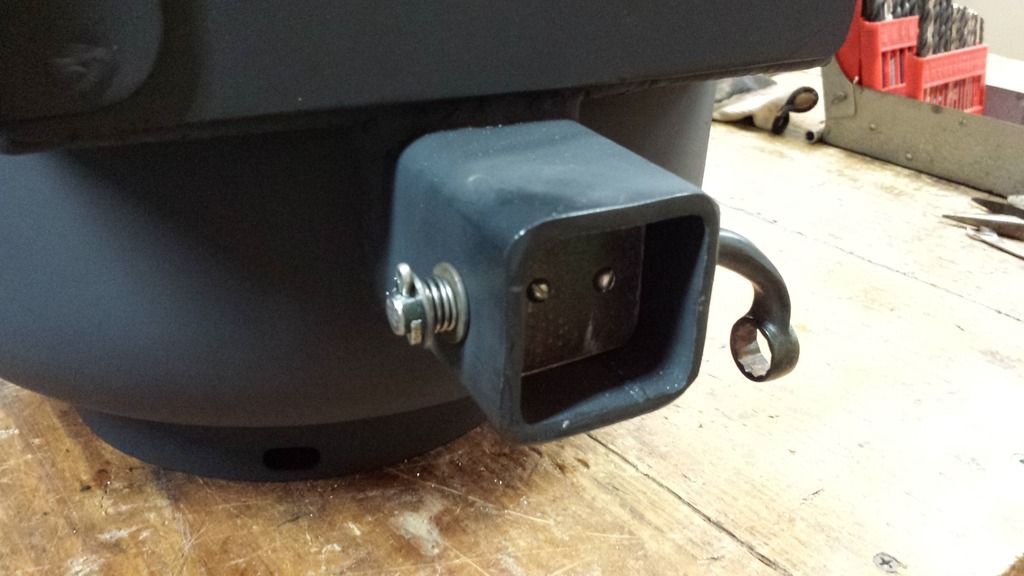 |
|
|
|
Post by scrub-buster on Jan 3, 2016 19:04:36 GMT -5
I put the top section and the rain cap on the chimney. That was a little sketchy standing on the top of my ladder. None of my helpers were home today. 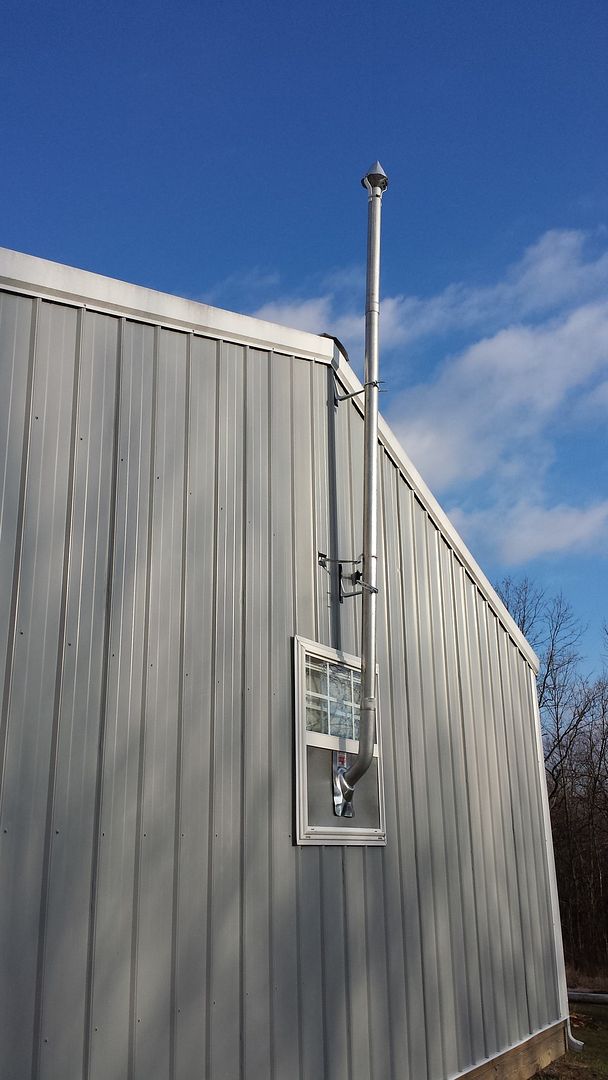 I broke up a couple of fire bricks to line the bottom of the stove. 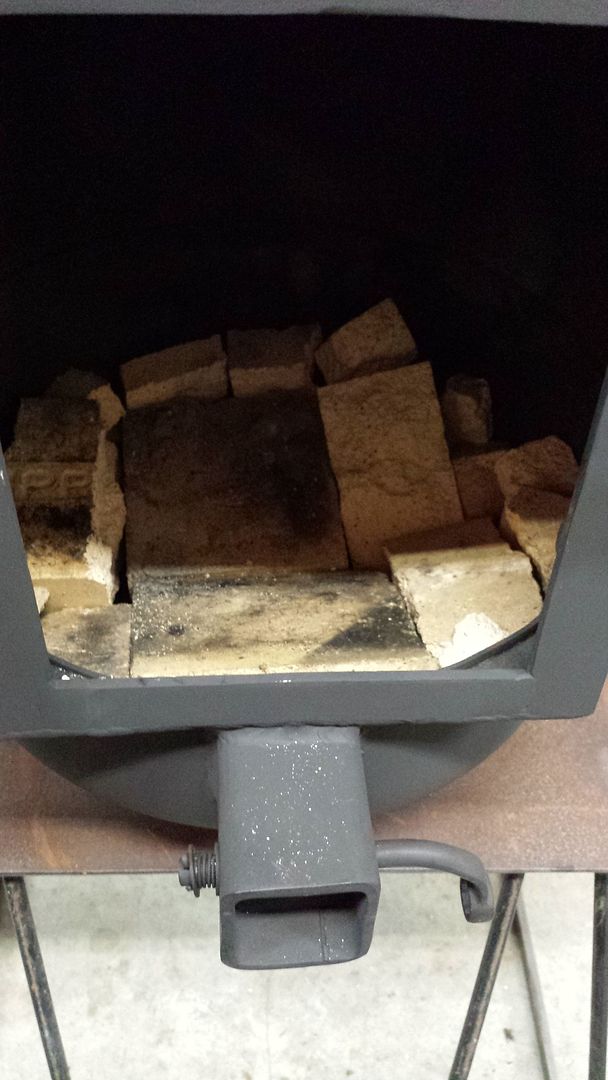 I connected the stove to the chimney and did a final check of everything. I put the concrete board behind it as a heat shield. I added a piece of aluminum flashing behind the chimney to reflect the heat away from the wall. 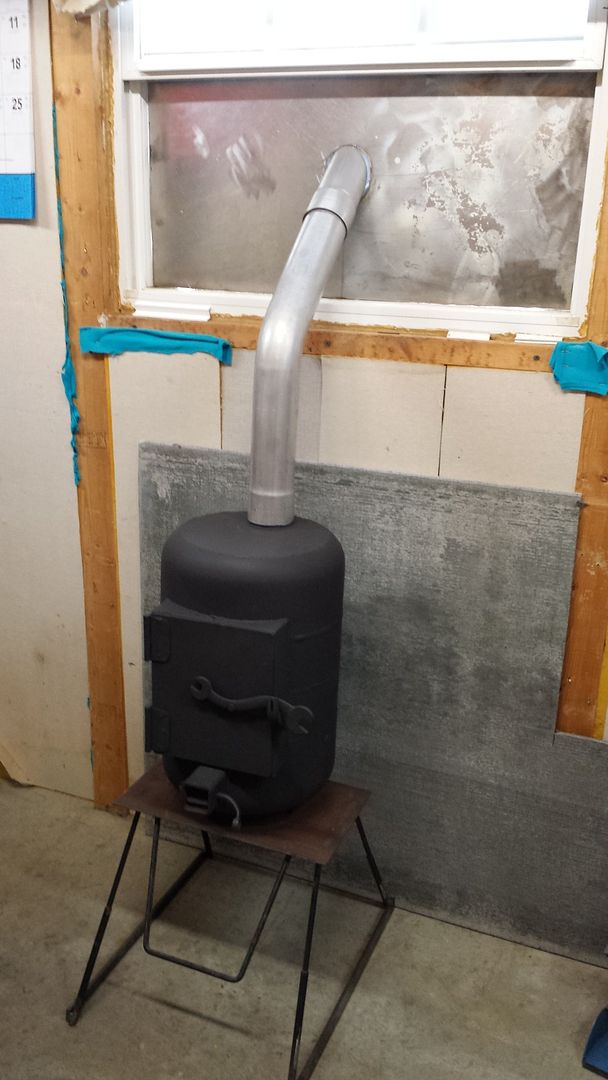 I put some osage shavings in it and lit them. I had a crackling fire in no time. It put off a lot of heat and had my workshop toasty warm in no time. Once I got a good bed of coals I just tossed in a small chunk of wood in every now and then to keep it going. I'm excited to have free heat for the winter. I want to get some fire rope to put around the chimney where it goes out the window. 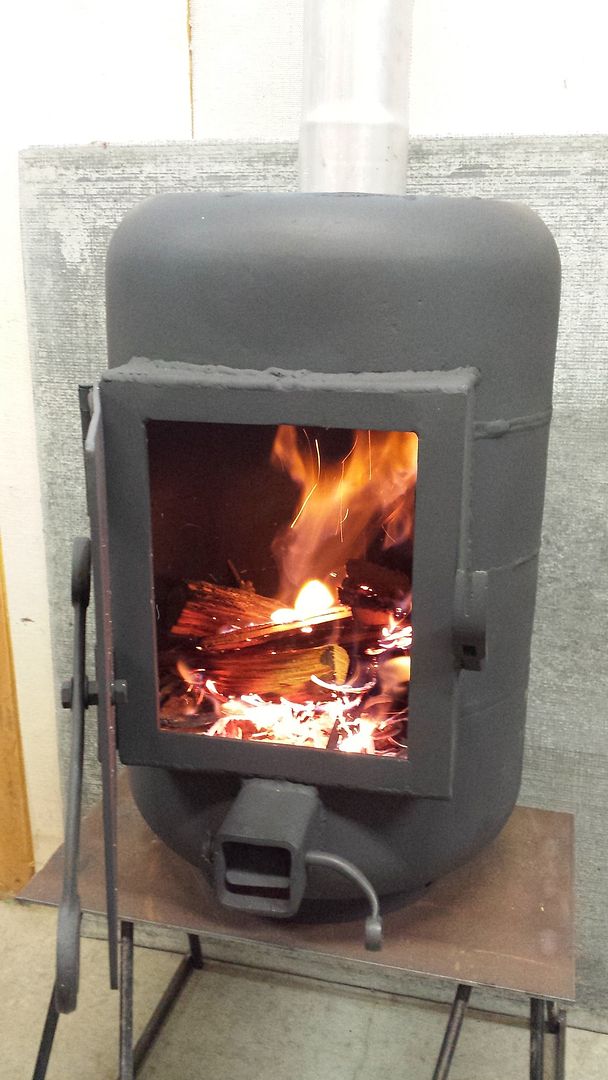 |
|
|
|
Post by nfalls116 on Jan 3, 2016 19:07:12 GMT -5
Looking good there pilgrim!
|
|
|
|
Post by deadeer on Jan 3, 2016 23:33:57 GMT -5
Looks great. I enjoy making things like this when possible/practical over buying. The door already looks like its a little bent/warped at the top. I have built/helped on about 20 different wood stoves over the years. We have had to reinforce the door one way or another on them, even if just an angle iron frame. Plus to make a good seal and keep unwanted drafted down, a rope seal around the edge may help. This may not be needed if you are only heating an area for a little while, as opposed to being a heat source for your home. Otherwise an outstanding conclusion to a fun project we have watched over the year. Congrats.
|
|
|
|
Post by scrub-buster on Jan 4, 2016 0:09:58 GMT -5
Thanks. The door frame ended up warping a little when he welded it. We tried to bend the door just a tiny bit to get a better fit when closed.
|
|
|
|
Post by dadfsr on Jan 4, 2016 6:46:16 GMT -5
Looks good!!!
Many years ago my brother and I welded together a wood stove that we cut out of a sheet of 1/4" boiler plate. Basically made a 2' by 2' box that had 2" channel welded on the sides which allowed a false back of sheet metal to channel air from a couple of small vent fans at the back to blow air out along the sides. Door was hinged with fence gate hinges-yes we did add some very small channel to the inside of the door that we used to hold fire rope to seal the door. Draft was a 2" pipe with a nut welded in the center inside and a bolt welded in the inside of a 2" cap was the draft control. Put a system of damper panels inside to run the updraft forward then back to the 6" outlet/chimney pipe. We put that in the basement of a story and half Cape Cod style house-luckily I was working part time at a wrecker service then and was able to lower that heavy beast down the outside steps! We heated that house almost exclusively with wood for the ten years we lived there.
That may be the only thing I might add to your project is just a small fan somewhere around the stove to circulate the air??
|
|
|
|
Post by steiny on Jan 4, 2016 6:52:59 GMT -5
Pretty neat !
How does it heat?
Bet if goes through the wood pretty fast.
|
|
|
|
Post by bullseye69 on Jan 4, 2016 12:40:20 GMT -5
Very nice.
|
|
|
|
Post by Jamie Brooks 1John5:13 on Jan 4, 2016 18:15:27 GMT -5
Really cool scrub. Do you make your own shoes too? We know you make your own camo hunting clothes.
|
|
|
|
Post by scrub-buster on Jan 4, 2016 18:46:10 GMT -5
I kept a small fire in it all day and it kept my workshop just a bit under 70. It doesn't burn as much wood as I thought it would. I probably burnt half a 5 gallon bucket worth.
|
|
|
|
Post by scrub-buster on Jan 4, 2016 18:48:16 GMT -5
Really cool scrub. Do you make your own shoes too? We know you make your own camo hunting clothes. I've been thinking it would be cool to make some moccasins for early bow season. A friend of mine made a pair this fall and he liked them. |
|
|
|
Post by saltydog on Jan 4, 2016 21:04:14 GMT -5
Great job scrub... Iv been work on my waste oil burner. I will post pics when Im done.
|
|


